In order to insulate a wooden window, the first thing you need is patience! And quite a lot of free time. For example, it took us for two whole days. Someone will say why it is needed? Put a plastic window and forget all the problems, but there can be quite a lot of reasons to leave a wooden frame, starting from a limited budget, and ending with care of the ecology.
So, the decision is made — we will insulate. Where to start?
The first important point is the choice of time. It will be good if all manipulations with windows will take place in the warm season. No wonder they say about the sled in the summer.
The second, no less important stage is the purchase of the necessary materials. We will need:
sealant;
seal;
Installation foam.
You may also need new stacks, window sills and paint. When we went to this experiment, we decided to paint the frame and change the windowsill — to do so for centuries.
And then the appointed day has come. We measured our window and went to the construction market. What is important to know to buy the necessary materials?
Sealant needs to choose a universal silicone. It will stick well to the glass and ensure the tightness of the joints. Choose transparent, it will not be visible if you stain the glass. The consumption will depend on the size of the window that you are going to insulate. On our window — size 150×150 cm. — enough banks with a volume of 280 ml. It would be nice to buy a sealant pistol, a little thing is inexpensive, but painfully simplifying.
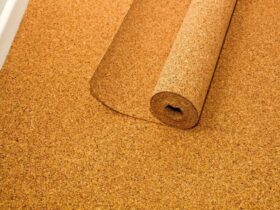
When choosing a sealant, be guided by the size of the cracks between the sash and the frame. In addition, it is self -adhesive, and sometimes one that needs to be glued independently, for example, with the same sealant (then have in mind that the sealant will be required more). You decide. The number of seals depends on the size of your window. We have chosen a self-adhesive D-profile (it is for slots from 3 to 6 mm).
Choose an all -season foam on the installation, it is more durable. One cylinder was enough for us 750 ml.
Skiks may not have to buy. It all depends on the state in which you are and how neatly you can remove them. Ours were not very attractive, so we bought new. We also bought a windowsill and white paint, but this, as they say, at will.
Of course, tools will be required — a screwdriver or a chisel to remove the staff, and a small hammer and cloves without hats to return the staff to the place.
So, here he is our action plan!
Carefully remove the staff. It is possible not very carefully if you decide to change them.
We take out the glass. We put in a secluded place.
Then we remove the old paint and dust from the frame as thoroughly as possible. We did this with a knife and vacuum cleaner.
If you still decide to paint the frame, now is the time-there is no glass, the frame is prepared. And don’t forget to paint the stacks.
We go to this point after the paint dries completely. We apply a sealant in the grooves of the frame, we try to do it carefully. When the entire perimeter is smeared, we insert the glass. When you put the glass in place, part of the sealant under pressure crawls out, do not touch it, let it freeze. Continue your work so far.
Когда стекло водружено на место, нужно вернуть туда же и наши штапики. Be careful — it is important not to break the glass and not press it too much.
Now is the time to return to the surplus sealants that crawled out when you hoisted the glass in place. The whole secret is that when the sealant froze, its excess is easy to cut off with a sharp knife. You do not need to mess with rags, dirty hands, glass and everything around.
But back to our frame. The most dirty work is done. Our frame was double and all this was gone all day. So calculate those forces.
The next morning we took up the seal. It seemed that the matter was completely simple, but it wasn’t there. First you need to clean the place for which the elastic band will glue. We missed this point. To. The frame was painted yesterday and directly shone with cleanliness. Then you can proceed to gluing. It is important to do this carefully, slightly pulling the tape in the corners so that it does not interfere with the window closing.
The window is ready. But that’s not all. Now you need to do the windowsill. It is necessary to remove the windowsill, remove the old insulation if it was. Then, cleaning the surface of garbage, thoroughly propence all the cracks.
We finally did it! What we received as a result of 2 days of work?
The window is insulated and now we are not afraid of any frosts;
the glass stopped rattling;
The soundproofing of the room has improved significantly;
And as a bonus — the window looks like new!


Оставить коммент.